Have you ever opened your Twitter notifications only to be swamped by a sea of old alerts? It feels like trying to find a needle in a haystack. Notifications from weeks, even months ago, cluttering your feed and making it hard to find what's actually important. I know the feeling all too well. A few months ago, I realized I had notifications dating back to when I first joined Twitter. It was chaotic and frustrating. So, I decided to take matters into my own hands and figure out how to manage and filter out those old notifications.
In this post, I'll share some practical tips and tricks I've discovered to keep your Twitter feed clean and organized. While we can't actually delete notifications, we can manage and filter them effectively.

The Problem of Notifications
Twitter notifications pile up quickly, especially if you're active on the platform. From likes and retweets to mentions and direct messages, it can become overwhelming. The sheer volume of notifications can make it difficult to stay on top of what's relevant.
Managing Notifications
First things first, let's talk about managing notifications directly through Twitter settings. Here's what you can do:
- Accessing Notification Settings: Head over to your Twitter settings by clicking on your profile picture and selecting "Settings and privacy." From there, navigate to "Notifications."
- Turning Off Unnecessary Notifications: Under "Notifications," you can customize what kinds of notifications you receive. Consider turning off notifications for likes or retweets if they are overwhelming. This simple step can significantly reduce the noise in your notifications.

Here's a Step-by-Step Guide to Managing Old Twitter Notifications:
Step #1: Open Twitter in Your Browser:
- Launch your preferred web browser and navigate to Twitter.
Step #2: Log In to Your Account:
- Enter your credentials and log in to your Twitter account.
Step #3: Access Notifications:
- Click on the notifications icon (the bell symbol) on the left side of the screen.
Step #4: Navigate to Notification Settings:
- Click on the three dots (more options) at the top right corner of the notifications tab, then select "Settings."
Step #5: Filter Notifications:
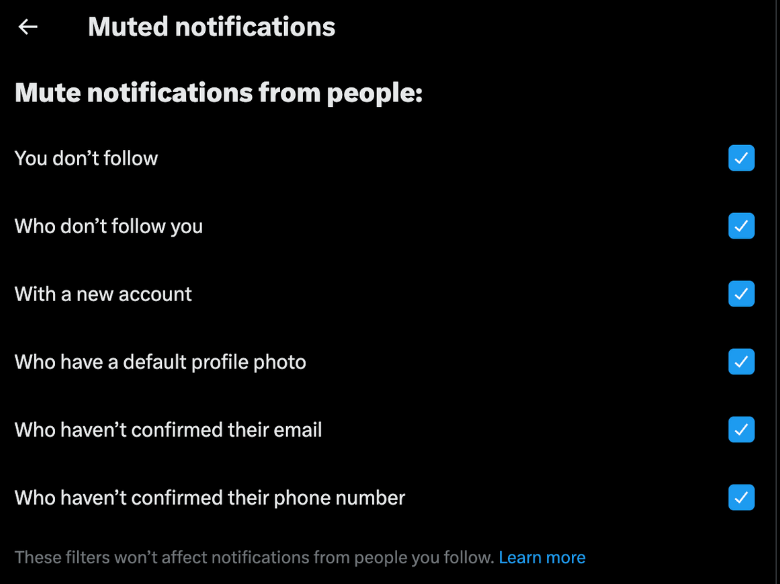
- Use the available filter options to categorize your notifications. This helps in identifying and managing the ones you want to see and filtering out the ones you don't.

Step #6: Customize Notification Settings:
- Adjust your notification settings to avoid spammy mentions and irrelevant alerts. This can include turning off notifications from certain types of accounts or keywords.
Step #7: Regularly Review Notifications:
- Make it a habit to regularly review and manage your notifications. This will help you stay on top of important alerts and keep your feed organized.

Conclusion
By managing your settings, filtering out the noise, and establishing a routine, you can take control of your Twitter notifications and keep your feed clutter-free. While it's unfortunate that you can't delete notifications directly, which can be a bit disappointing, there is a silver lining.
You can still manage your Twitter feed effectively. For instance, you have the ability to delete your tweets by date, keyword, or even all of them using the Circleboom Twitter tool. This can significantly declutter your profile and enhance your overall Twitter experience.


