
Scheduling posts on LinkedIn sounds simple in theory. You plan your content, schedule it in advance, and expect it to go live at the right time without any extra effort.
In practice, it doesn’t always work that smoothly.
If you’ve ever scheduled a post on LinkedIn and later wondered whether it was actually queued, published, or even saved correctly, you’re not alone. Knowing how to see scheduled posts on LinkedIn is important, especially if you care about consistency and timing.
Let’s walk through how LinkedIn scheduling works, where to find your scheduled posts, and why I eventually stopped relying on LinkedIn’s native scheduler altogether.
Does LinkedIn Allow You to Schedule Posts?
Yes, LinkedIn has a built-in scheduling feature for both personal profiles and company pages.
You can schedule standard text posts, image posts, and document posts directly from LinkedIn’s post composer. Once scheduled, LinkedIn is supposed to publish the post automatically at the selected date and time.
On paper, this sounds useful. But the experience has some serious limitations.
How to Schedule a Post on LinkedIn
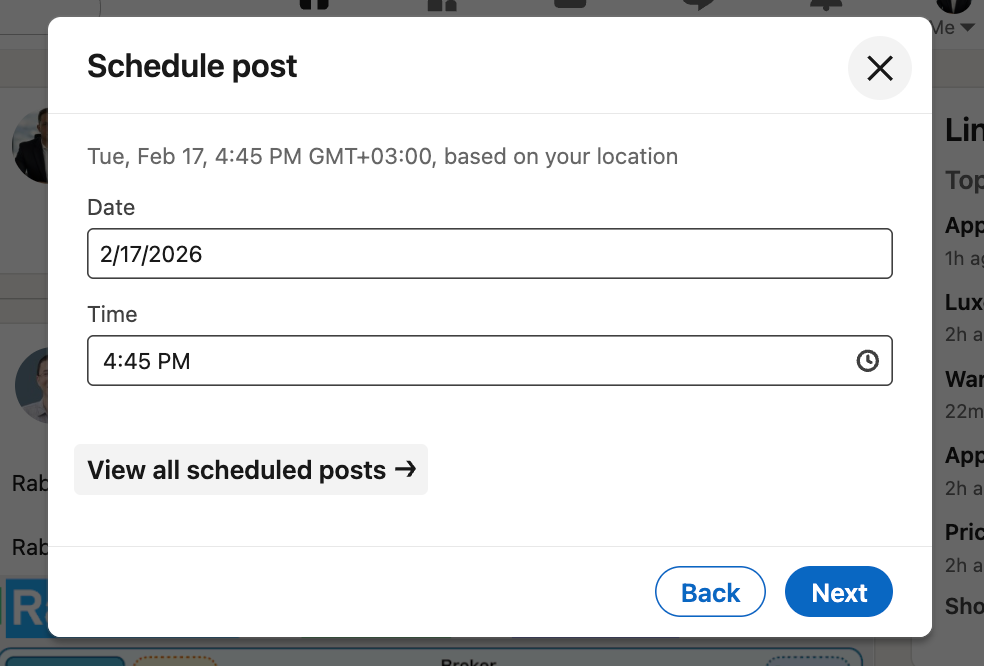
When creating a post on LinkedIn, you’ll see a small clock icon next to the “Post” button.

By clicking it, you can:
- Select a date
- Choose a time
- Schedule the post instead of publishing immediately
After confirming, LinkedIn tells you that the post is scheduled.
So far, so good.
How to See Scheduled Posts on LinkedIn
To view your scheduled posts on LinkedIn, you need to:
1. Open the LinkedIn post composer
2. Click on View all scheduled posts
3. Access the scheduled posts section
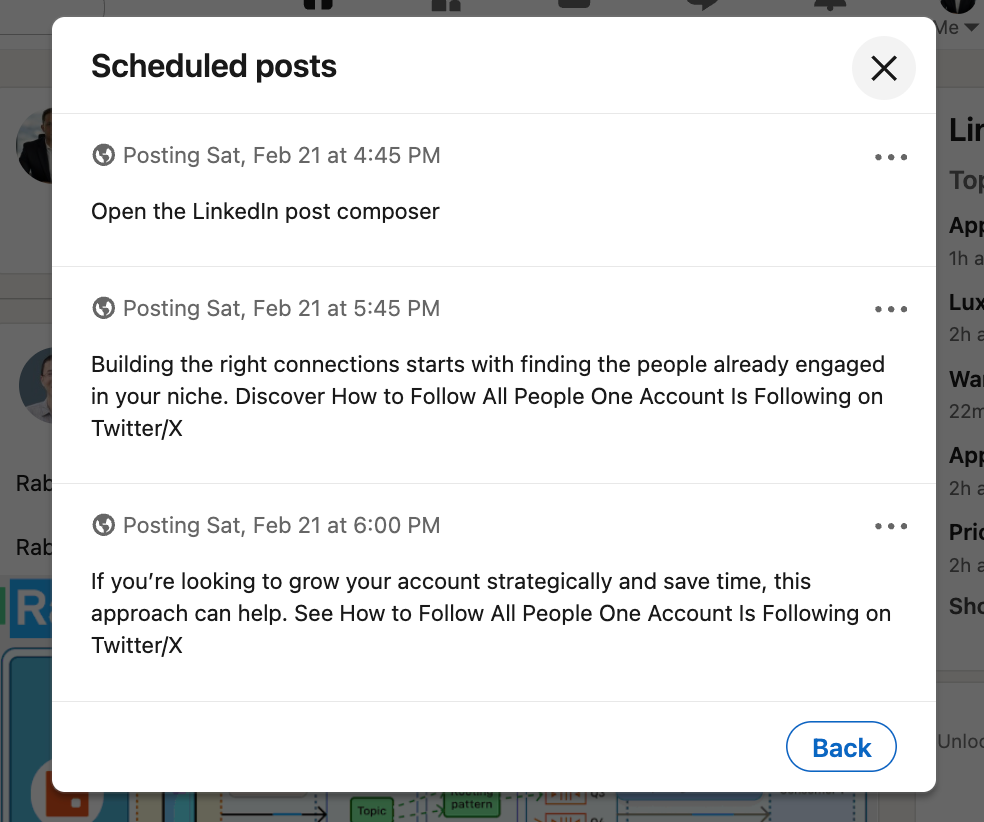
Here, LinkedIn should display a list of your upcoming scheduled posts with their publish dates and times.
In theory, this is where you manage everything.
Why LinkedIn’s Scheduling Feature Is Not Reliable
This is where things start to fall apart.
In real usage, LinkedIn’s scheduling feature often causes frustration for several reasons:
🔴 Scheduled posts sometimes don’t appear in the list at all
🔴 Posts can disappear after being scheduled
🔴 There’s no clear warning if a post fails to publish
🔴 You can’t see a clean overview of all scheduled content
🔴 Managing multiple LinkedIn accounts becomes impractical
On top of that, LinkedIn gives you no insight into when your audience is actually online. You’re forced to guess the best time to post or rely on generic advice.
After running into these issues multiple times, I stopped trusting LinkedIn’s native scheduler.
Why I Use Circleboom Publish Instead of LinkedIn Scheduling
I wanted three things LinkedIn scheduling couldn’t offer:
- Reliability
- Visibility of all scheduled posts
- Data-driven timing
That’s why I switched to Circleboom Publish.

Circleboom Publish is a social media management tool that allows users to manage multiple LinkedIn accounts from one place. Instead of jumping between profiles or pages, everything lives inside a single dashboard.
Beyond scheduling, it also includes:
🟢 An AI post generator for captions and ideas
🟢 Image curation tools for visual content
🟢 A powerful LinkedIn scheduling tool built for consistency
But the biggest difference is how scheduling works.
What Makes Circleboom Publish Scheduling Better Than LinkedIn
LinkedIn lets you choose a time. Circleboom helps you choose the right time.

Circleboom Publish analyzes your followers’ and connections’ activity patterns. It looks at:
- When they post
- When they comment
- When they engage most
Based on this behavior, it identifies the hours when your audience is actually online. You’re not guessing or copying generic “best time” charts. You’re scheduling posts based on your real audience.
This makes a noticeable difference in impressions and early engagement.
How to Schedule a LinkedIn Post with Circleboom Publish (Step by Step)
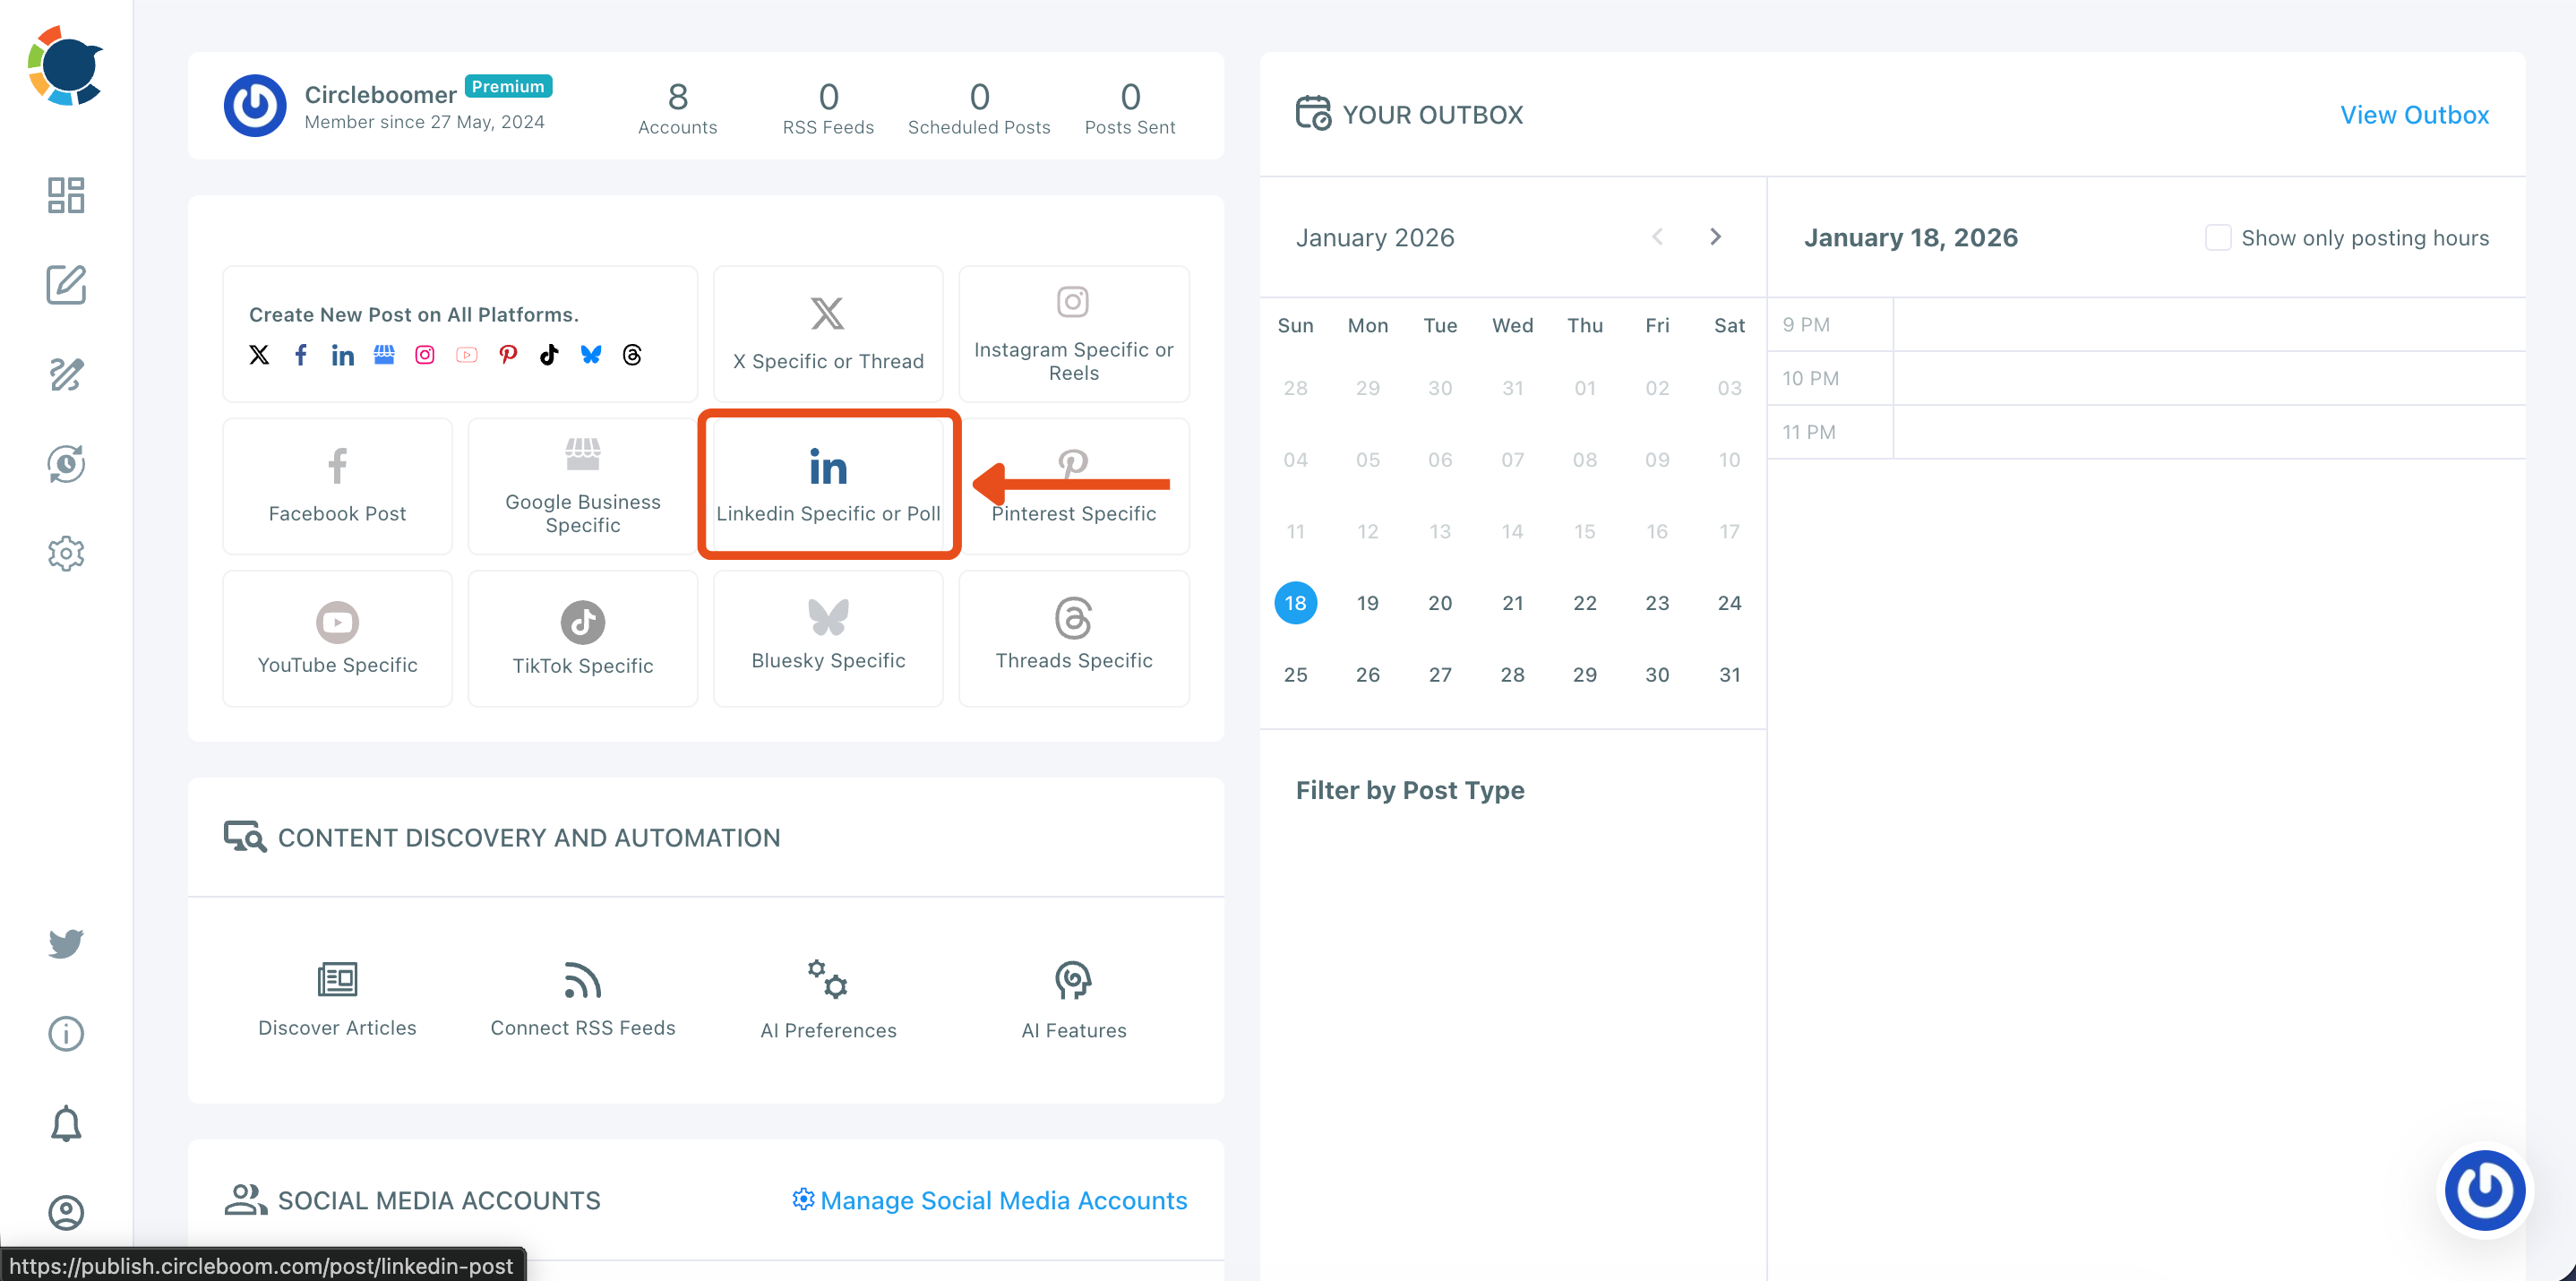
Step #1: Start a new LinkedIn post
From your Circleboom Publish dashboard, go to the “Create New Post” area and click LinkedIn Specific or Poll.
This opens the LinkedIn composer so you can create a post designed specifically for LinkedIn.
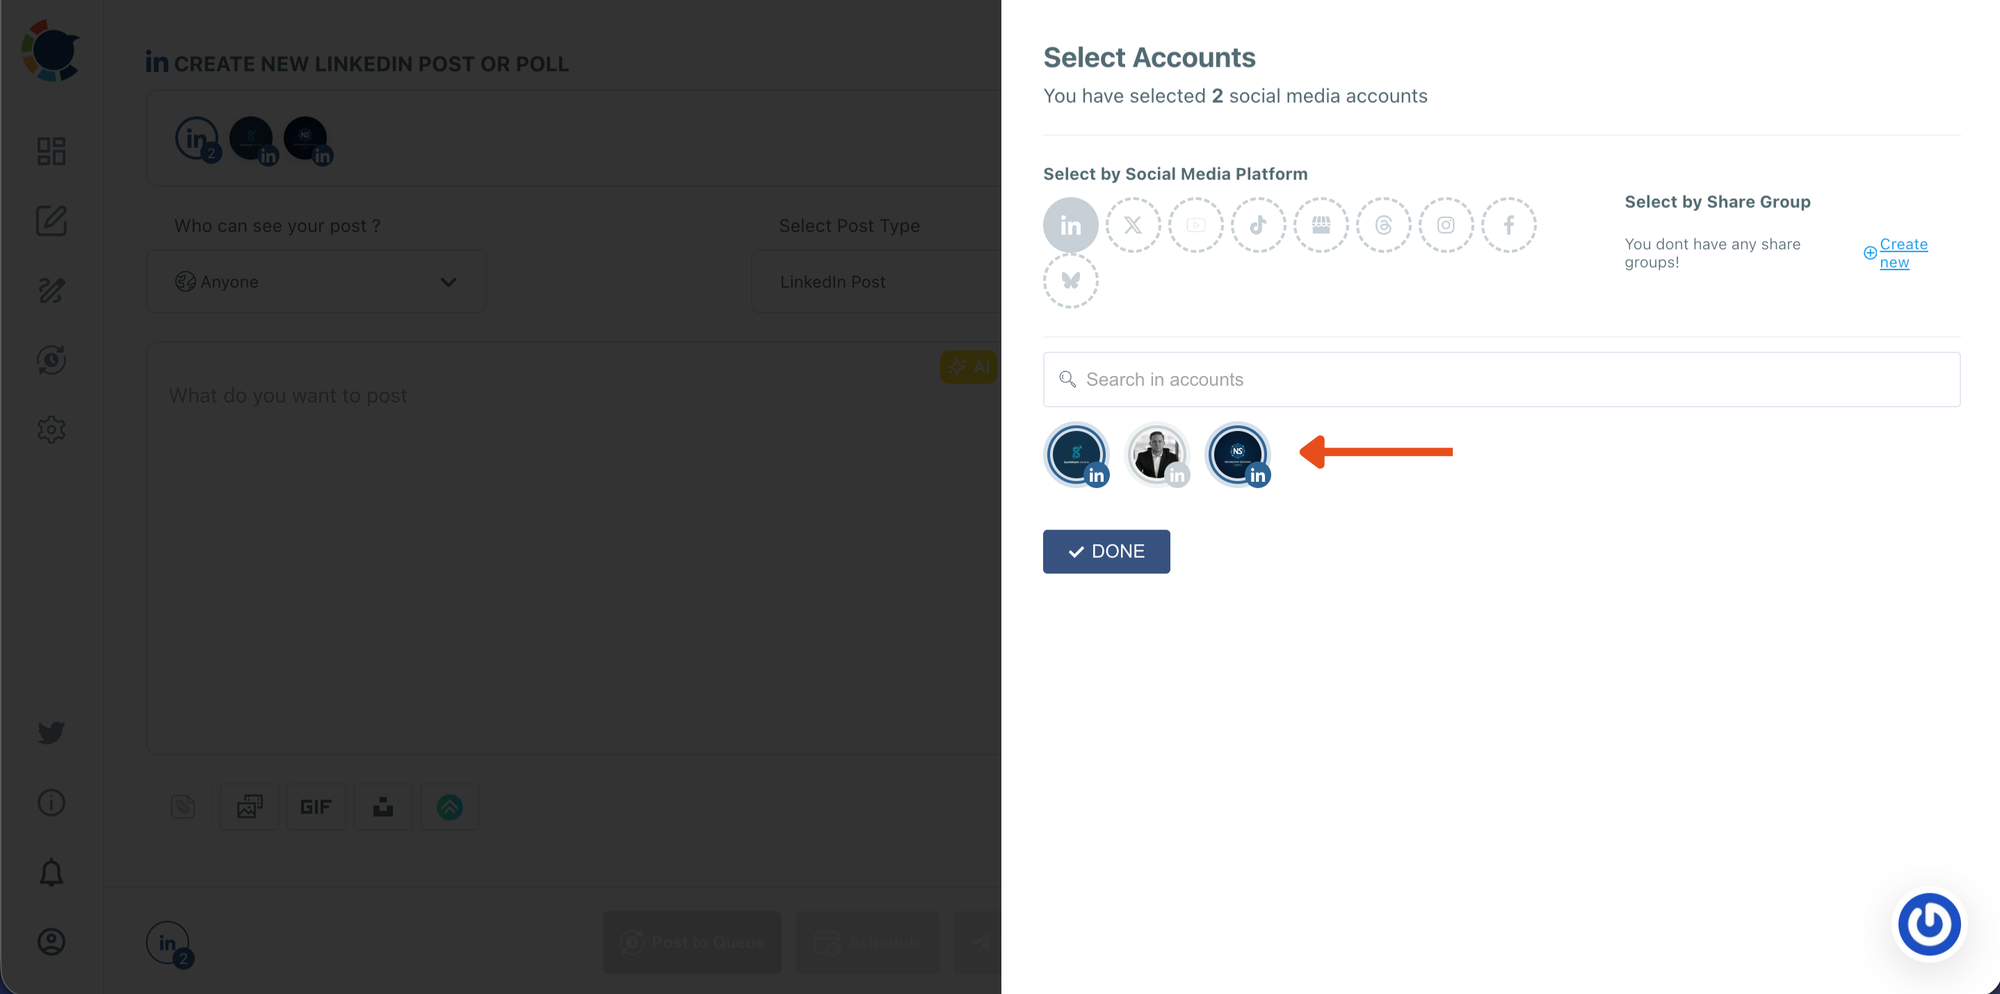
Step #2: Select the LinkedIn account(s) you want to publish from
In the Select Accounts panel, choose the LinkedIn profile or page you want to use.
If you manage multiple accounts, you can select more than one. When you’re ready, click DONE to move forward.
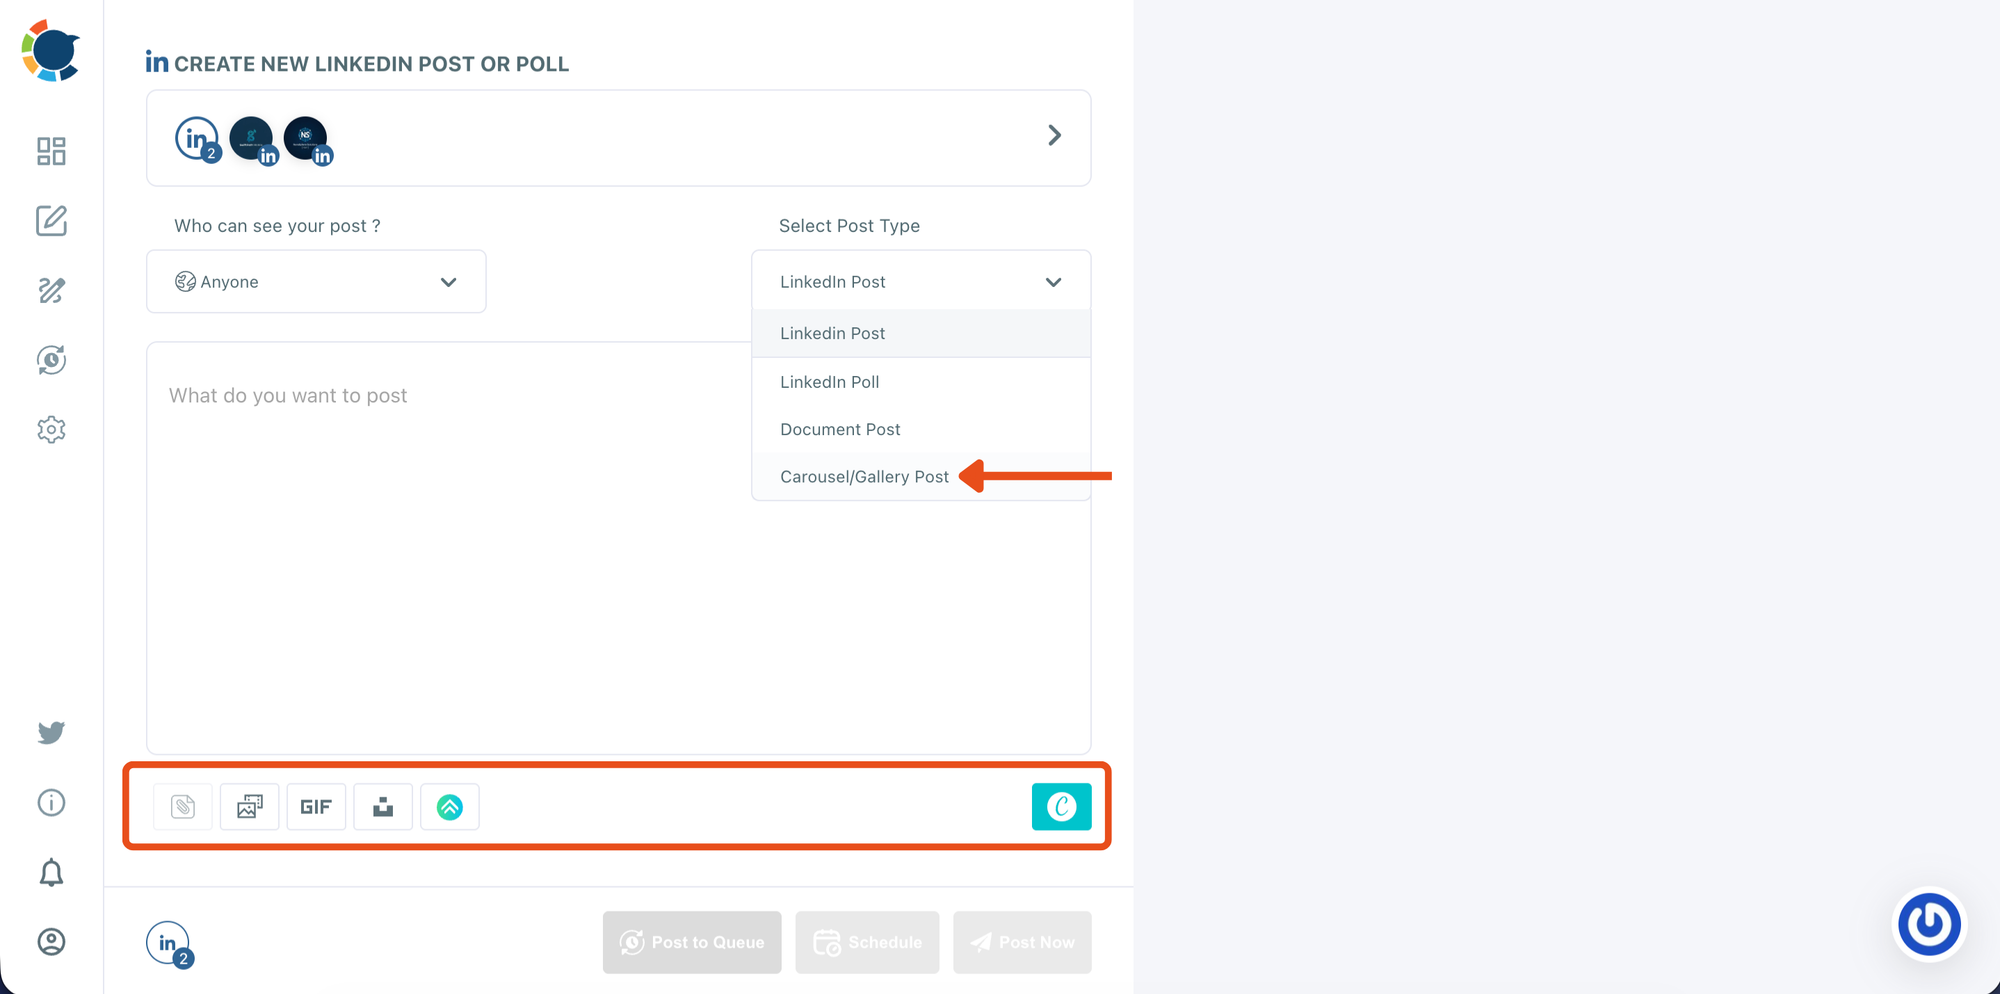
Step #3: Choose the Carousel/Gallery post type
Inside the LinkedIn composer, open the Select Post Type dropdown and select Carousel/Gallery Post.
This enables carousel publishing and prepares the media area where you’ll upload your slide images.
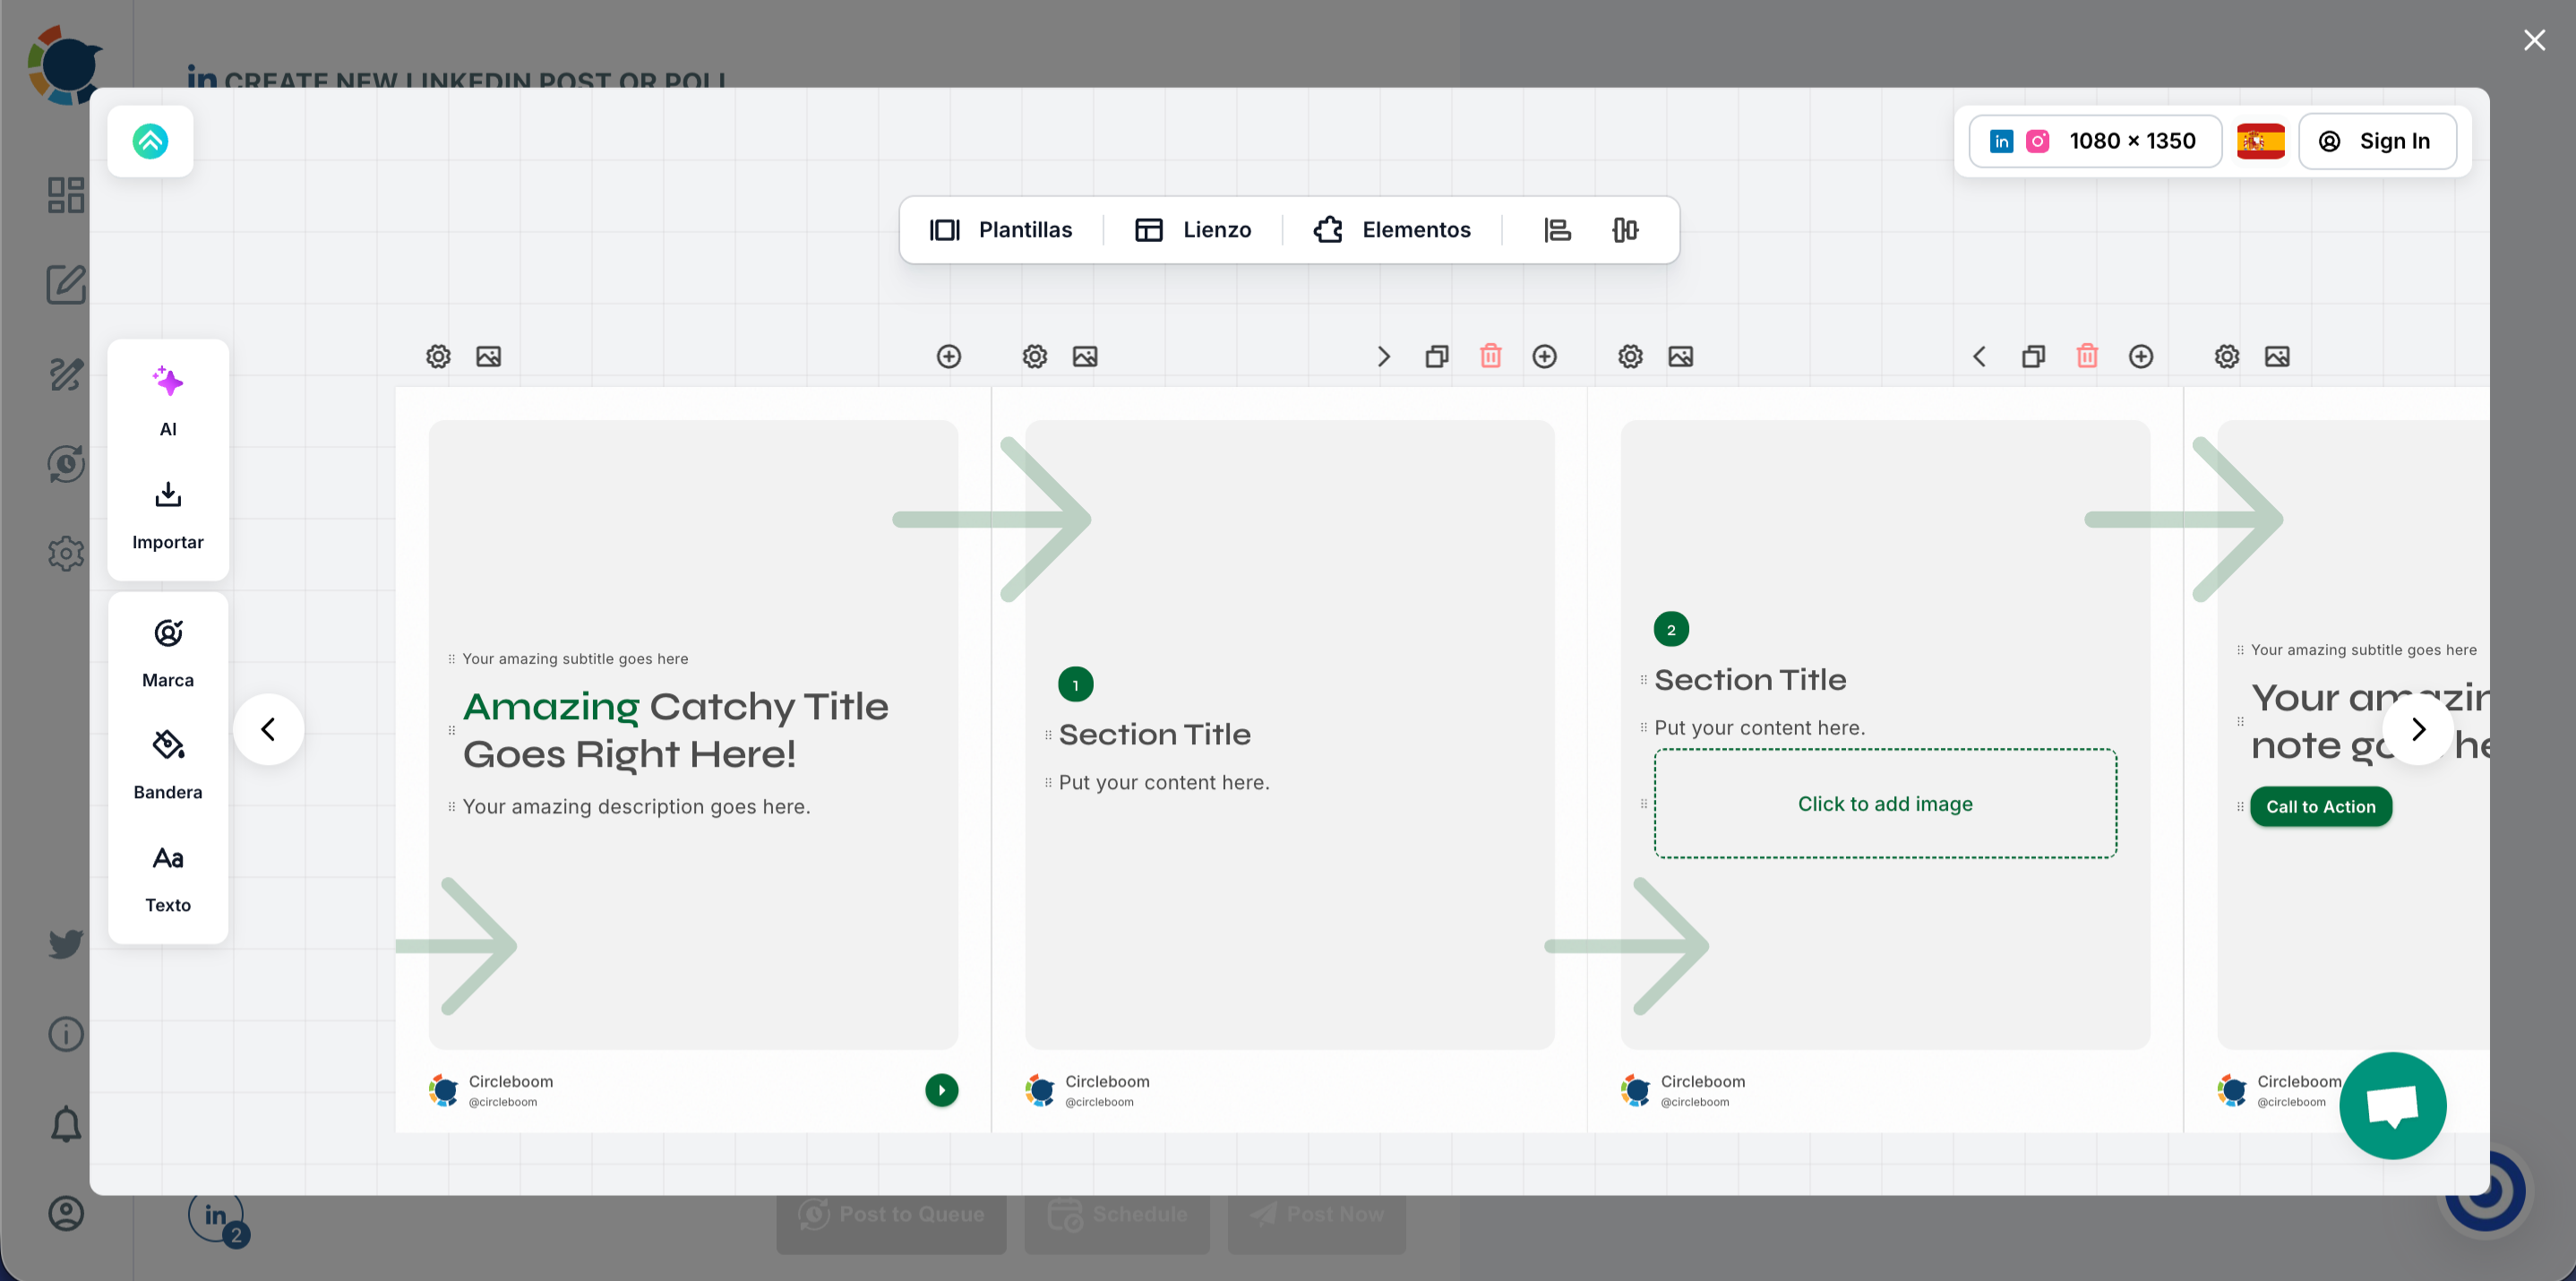
Step #4: Design your carousel slides in the editor
Open the integrated design editor and pick a carousel template.
Edit each slide by updating titles, adding visuals, adjusting layout, and keeping your branding consistent across all pages.
Once finished, export or save your slides so they’re ready to upload.
Step #5: Upload your carousel slides and write your LinkedIn caption
Or upload your slide images into the media bar (drag-and-drop or click to upload).
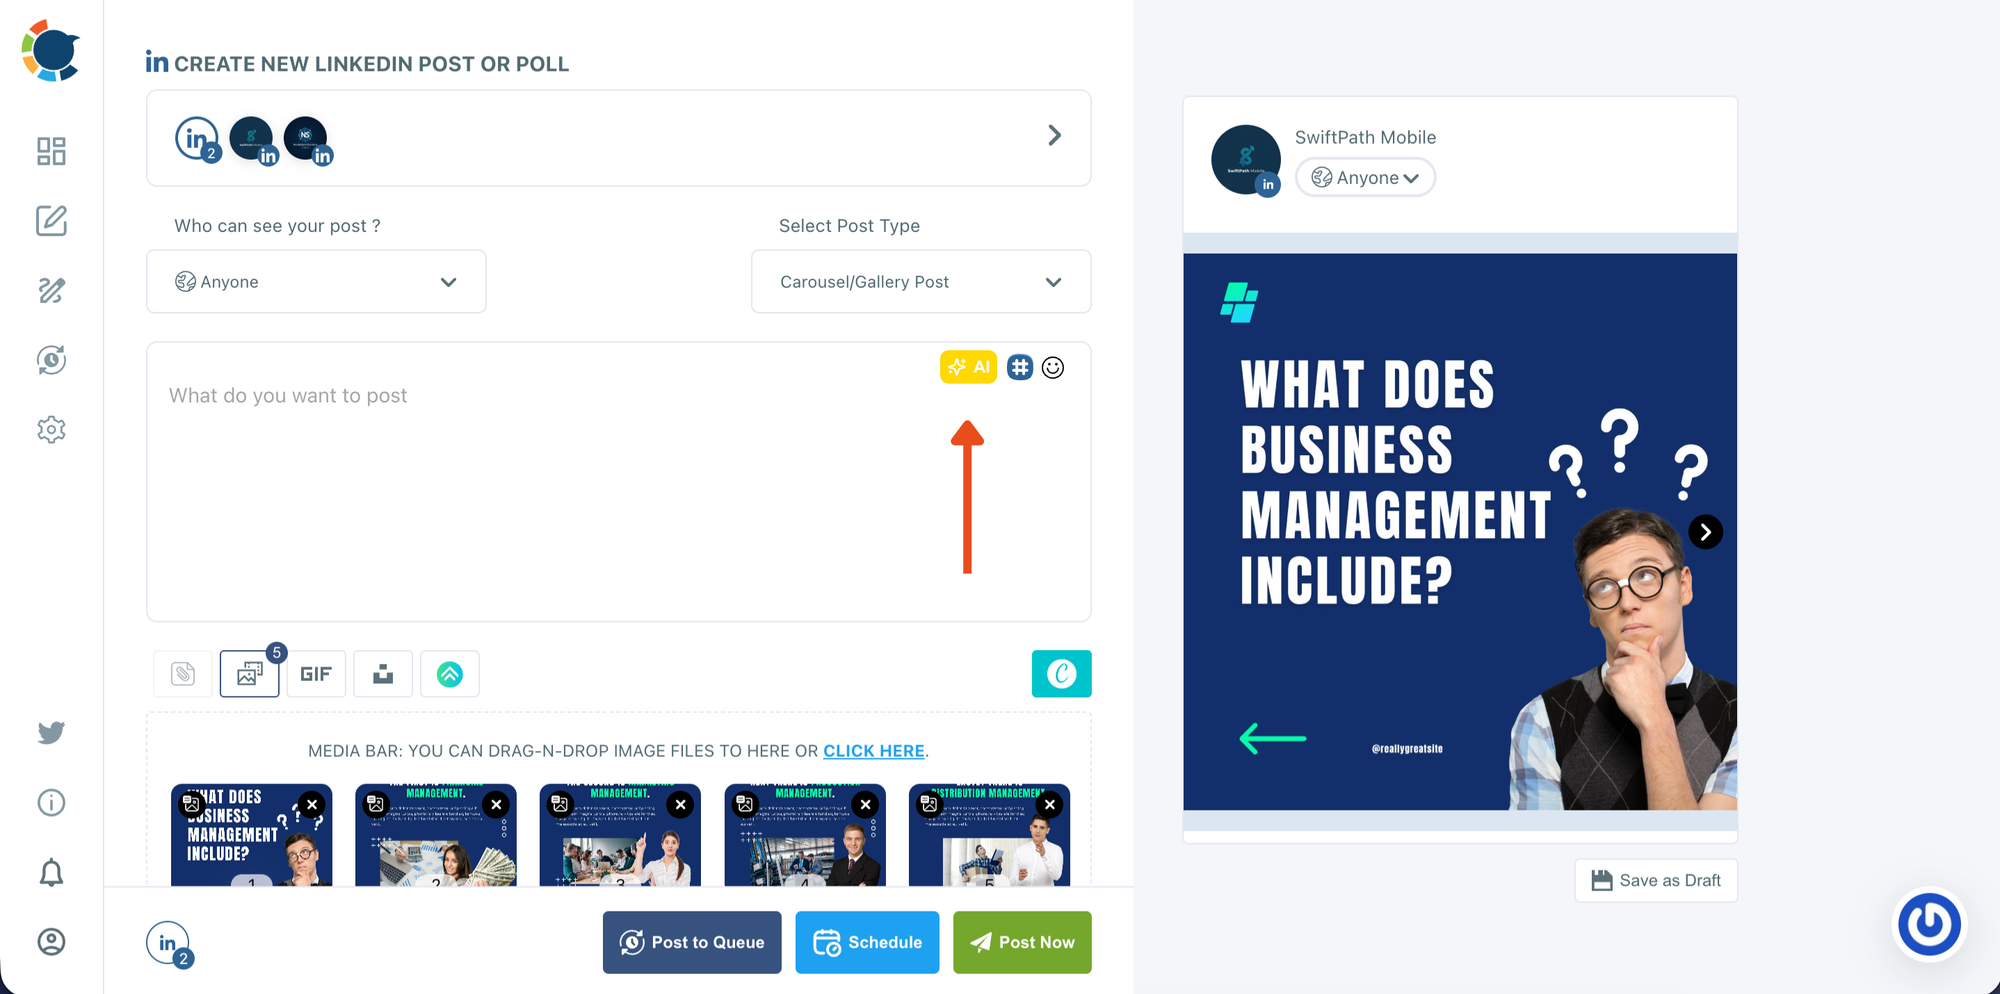
Check the preview on the right to confirm the slide order and how the carousel will appear on LinkedIn. Then write your caption in the text box.
If needed, use the AI option to generate or refine your copy based on the carousel topic.
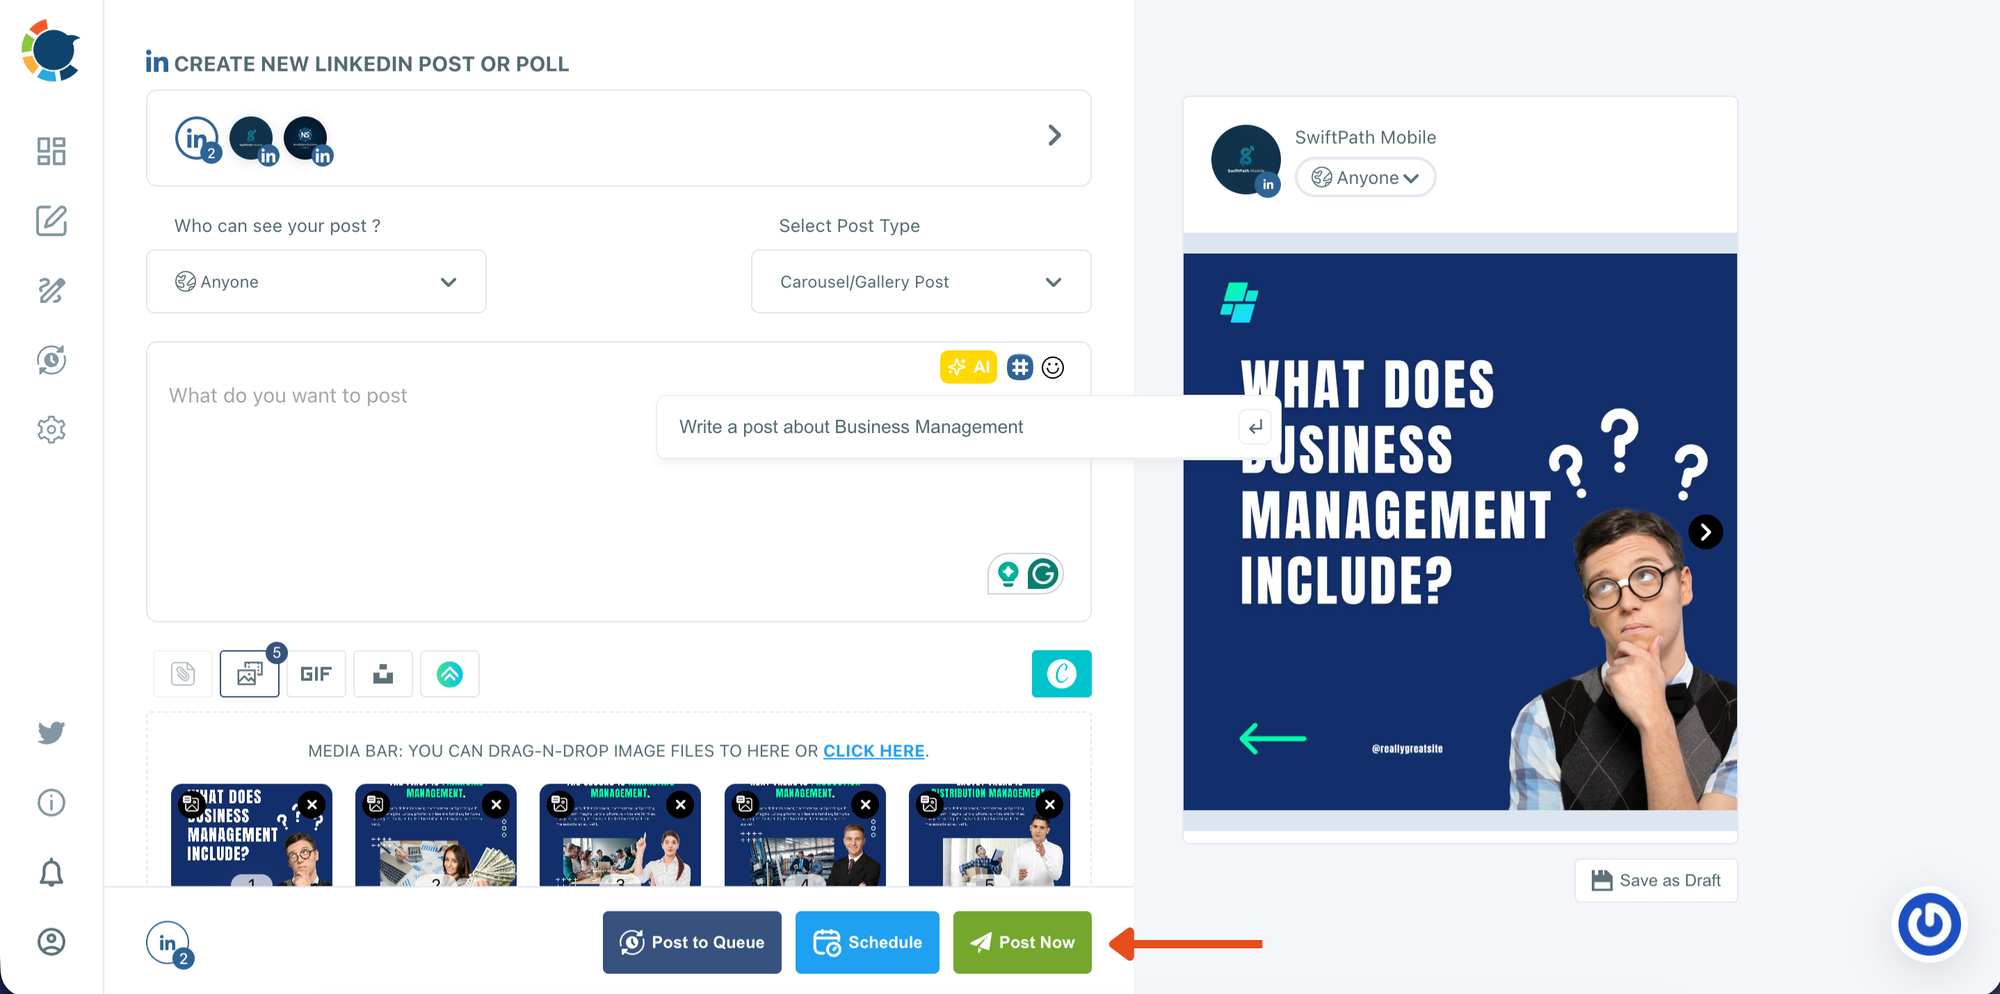
Step #6: Decide whether to post now or schedule for later
When everything looks ready, choose how you want to publish:
- Post Now to publish immediately
- Schedule to set a date and time for later
This step is where you move from final review into publishing mode.
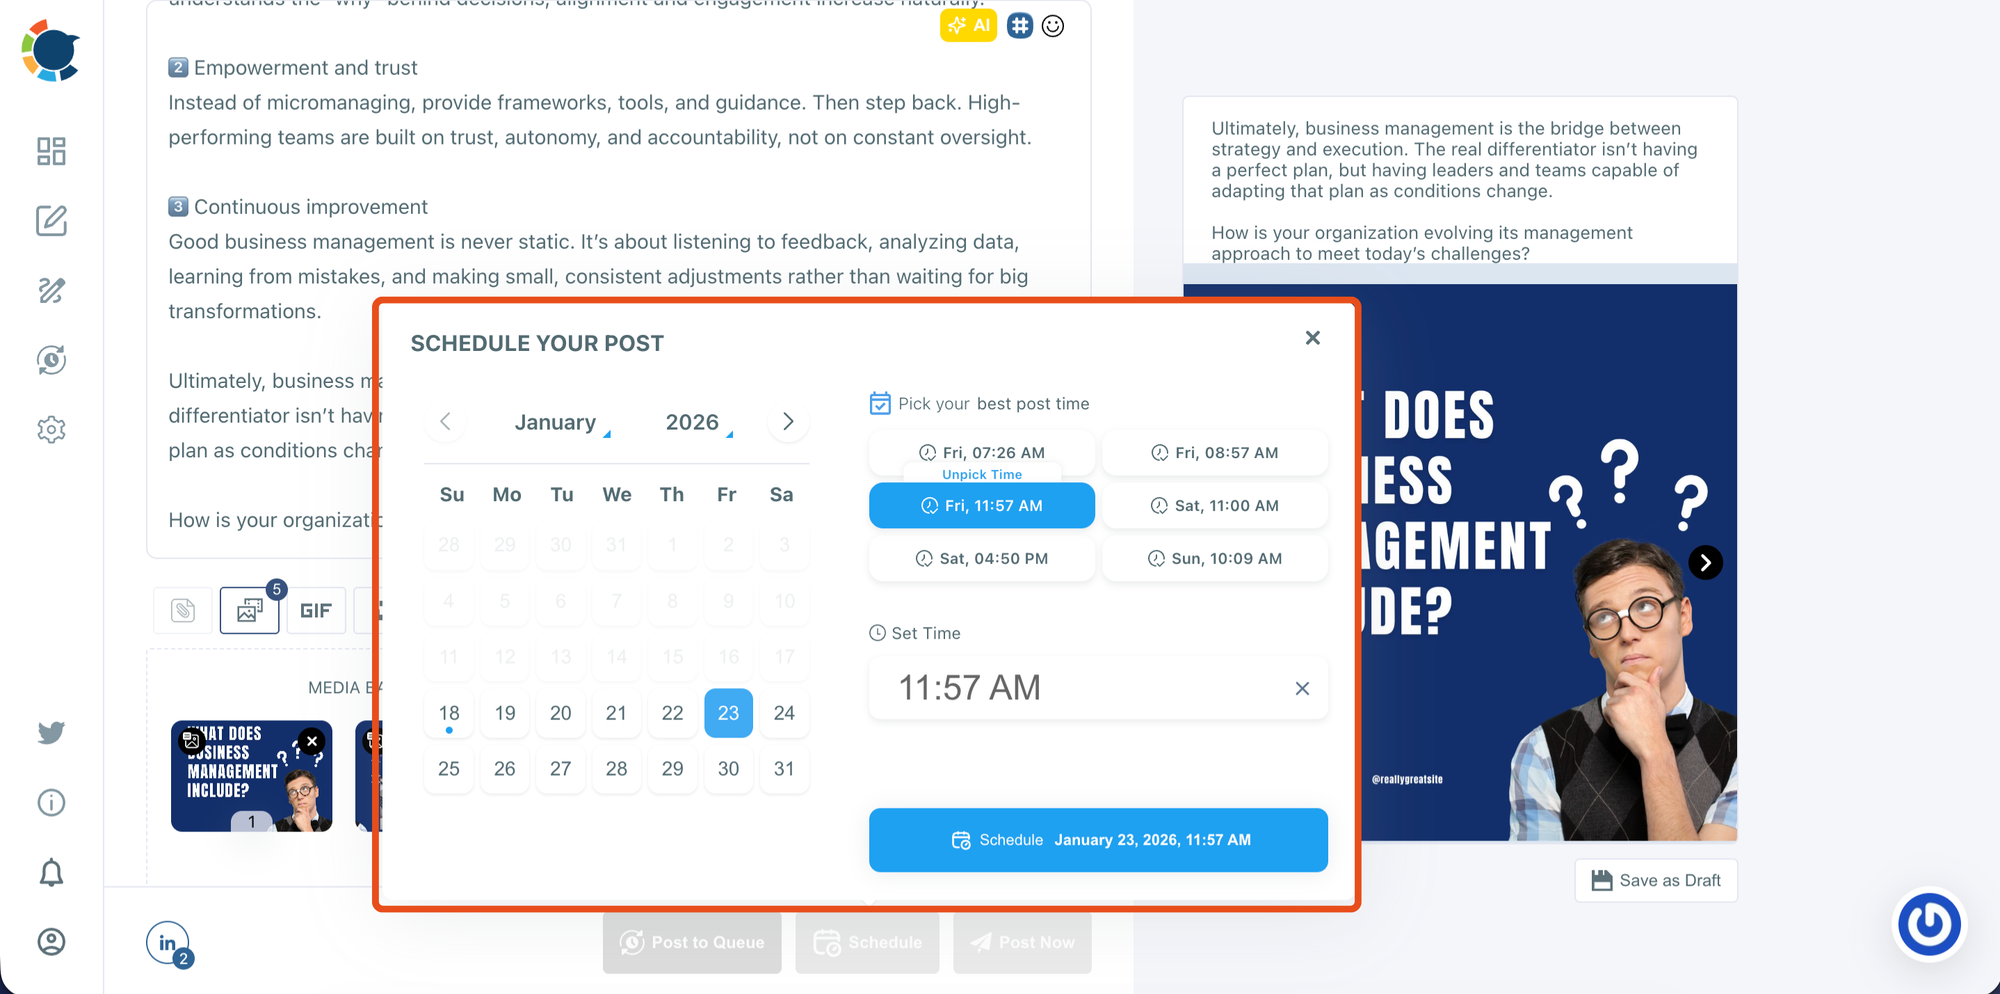
In the scheduling window, select the date from the calendar. Choose one of the suggested best-time options or manually set your own time.
Then click Schedule to confirm and add your carousel post to your publishing plan.
How to See Scheduled Posts on Circleboom Publish
Unlike LinkedIn, Circleboom Publish makes this part very clear.
All scheduled posts are visible inside the Outbox section.
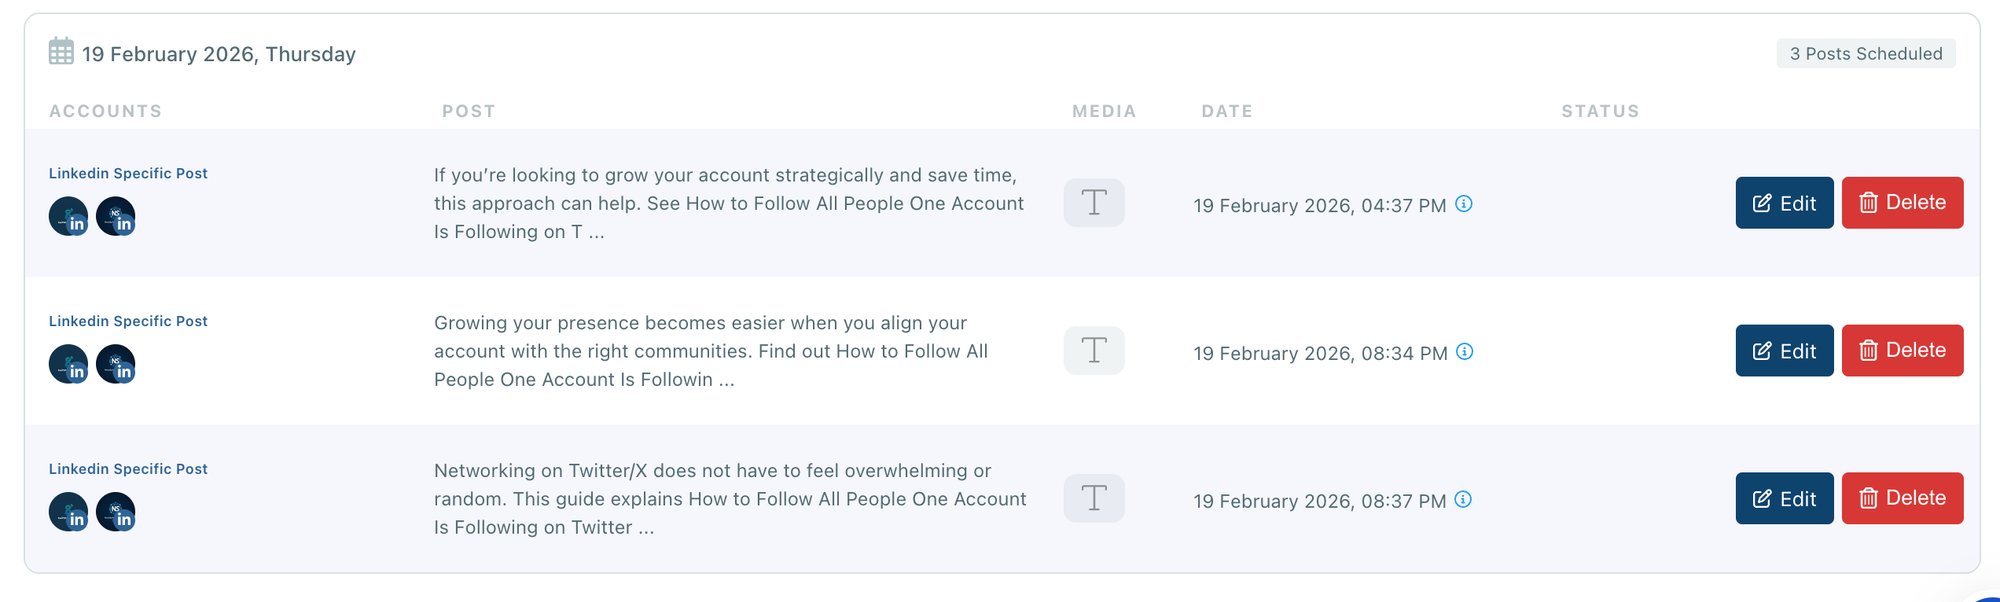
In the Outbox, you can:
- See all upcoming scheduled posts
- Check platform, date, and time
- Preview content before it goes live
- Edit, reschedule, or delete posts easily
There’s no confusion about whether a post is scheduled or not. Everything is transparent and centralized.
LinkedIn Scheduling vs Circleboom Publish
LinkedIn scheduling is basic and limited. It works occasionally, but it lacks visibility, reliability, and timing intelligence.
Circleboom Publish gives you:
- A clear view of all scheduled posts
- Reliable publishing
- Best time to post recommendations
- Multi-account LinkedIn management
- Content creation and image tools
If scheduling matters to your workflow, the difference is immediately noticeable.
Final Thoughts
Knowing how to see scheduled posts on LinkedIn is important, but relying on LinkedIn’s native scheduler comes with risks.
If you want control, visibility, and better timing, using a dedicated tool makes a real difference. With Circleboom Publish, scheduled posts are easy to find, easy to manage, and published when your audience is most active.
That’s the difference between hoping a post goes live and knowing it will.
)